Nail art trends shift quickly, but some ideas stay timeless. If you’re after something elegant yet approachable, the simple flower nail is a perfect choice. The look blends dainty petals with clean lines, making it suitable for everyday wear, weddings, or photos. With a little practice and the right tools, you can recreate a professional-quality manicure at home. This guide walks you through a straightforward approach that prioritizes balance, subtle color, and neat lines. The centerpiece is a tiny floral motif that can be adapted to any nail length or shape. Try it with soft pinks, creams, or corals for a romantic, minimalist vibe, and you’ll see why this design endures.
What you’ll need
Gather a clear base coat, two coordinating nail polishes (one lighter shade for the petals, one slightly darker for the centers or accents), a fine nail art brush or dotting tool, a top coat, and cleanup supplies such as cotton swabs and nail polish remover. If you prefer a quicker option, you can also use floral nail decals or stamping plates, but the essential idea remains the same: a delicate flower on a polished canvas. Having a steady hand and a clean workspace helps you achieve crisp lines and a neat finish.
Step-by-step: creating the simple flower
Step 1: Prep nails. Shape your nails, push back the cuticles, and apply a base coat. Allow it to dry completely before moving on. A smooth surface is essential for neat lines and long-lasting wear.
Step 2: Paint the background. Apply a thin layer of your chosen base color and let it dry. If you want a softer look, you can add a second light coat. For a modern twist, try a sheer tint that lets the natural nail peek through faintly.
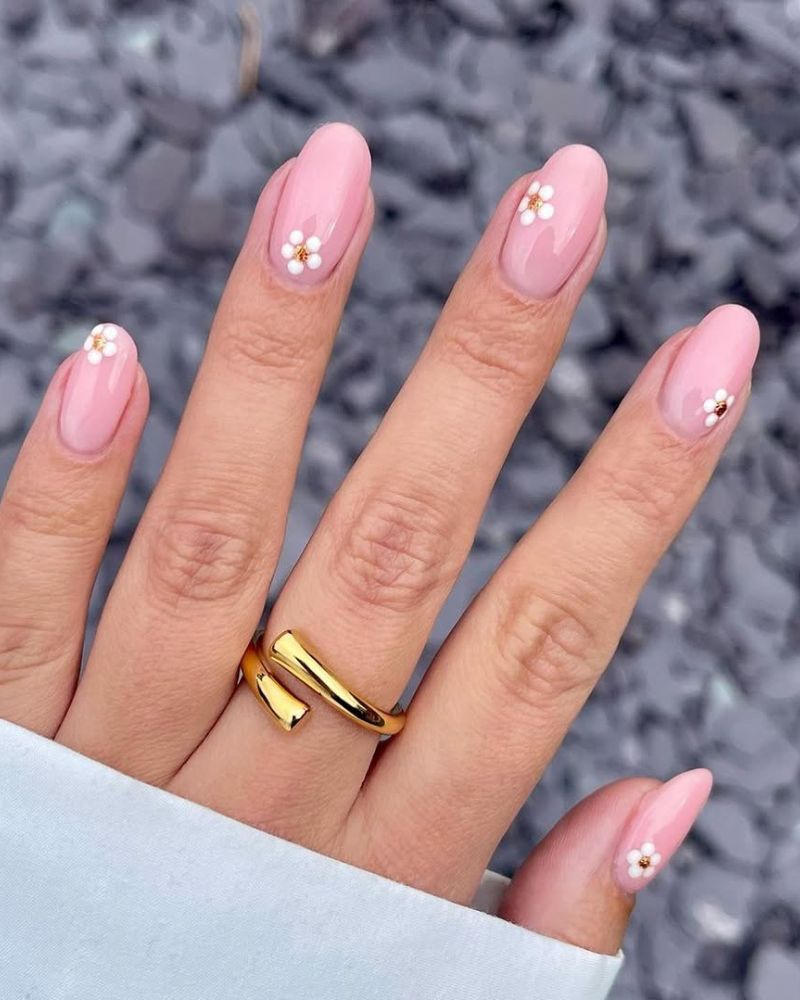
Step 3: Create the petals. Dip your fine brush or dotting tool into the lighter polish and form small petal shapes near the cuticle or toward the tip of the nail. Simple flower designs work best when you keep the petals delicate and slightly asymmetrical. You can layer a second darker dot at the center or add a tiny dot in the middle to simulate a stamen.
Step 4: Add subtle details. Use a tiny brush to add a few leaf-like strokes or a few short lines extending from the petals for depth. The goal is to hint at a flower rather than painting a full bouquet, so restraint is key.
Color ideas and variations
Pastel palettes—blush pinks, lavender, mint, or pale peach—create a soft, romantic vibe that complements a wide range of skin tones. For a bolder look, pair a strong base shade with white petals and a metallic accent at the tip or along one edge. Floral nail art can also suit seasonal themes: soft pastels for spring, vibrant corals for summer, warm tones for autumn, and crisp whites with a touch of gold for winter celebrations. No matter the color scheme, focus on clean edges and balanced composition to keep the design elegant rather than busy.
Finishing touches and longevity
Finish with a high-quality top coat to seal the design and add shine. If you’re new to nail art, you may want to cap the edges (the “thick edge” method) to reduce chipping. Allow ample drying time between layers, and consider using quick-dry drops or a fan to speed up the process. Proper cleansing before applying polish helps prevent smudges, and a light hand during application ensures the petals don’t blur into one another. With care, the simple flower nail can last up to a week or longer, depending on your daily activities and top-coat quality.
Maintenance and removal tips
Protect your manicure by avoiding harsh acetone on the treated nails; use an acetone-free remover when it’s time to remove or refresh the design. If chips appear, you can touch up only the damaged petal or add a small accent to disguise wear. Hydrate your cuticles with oil between sessions to maintain healthy-looking nails and reduce cracking. Practicing on a few nails at once can help you refine the petals and spacing for a more professional finish over time.
For more nail art ideas, visit the NewsDest homepage.