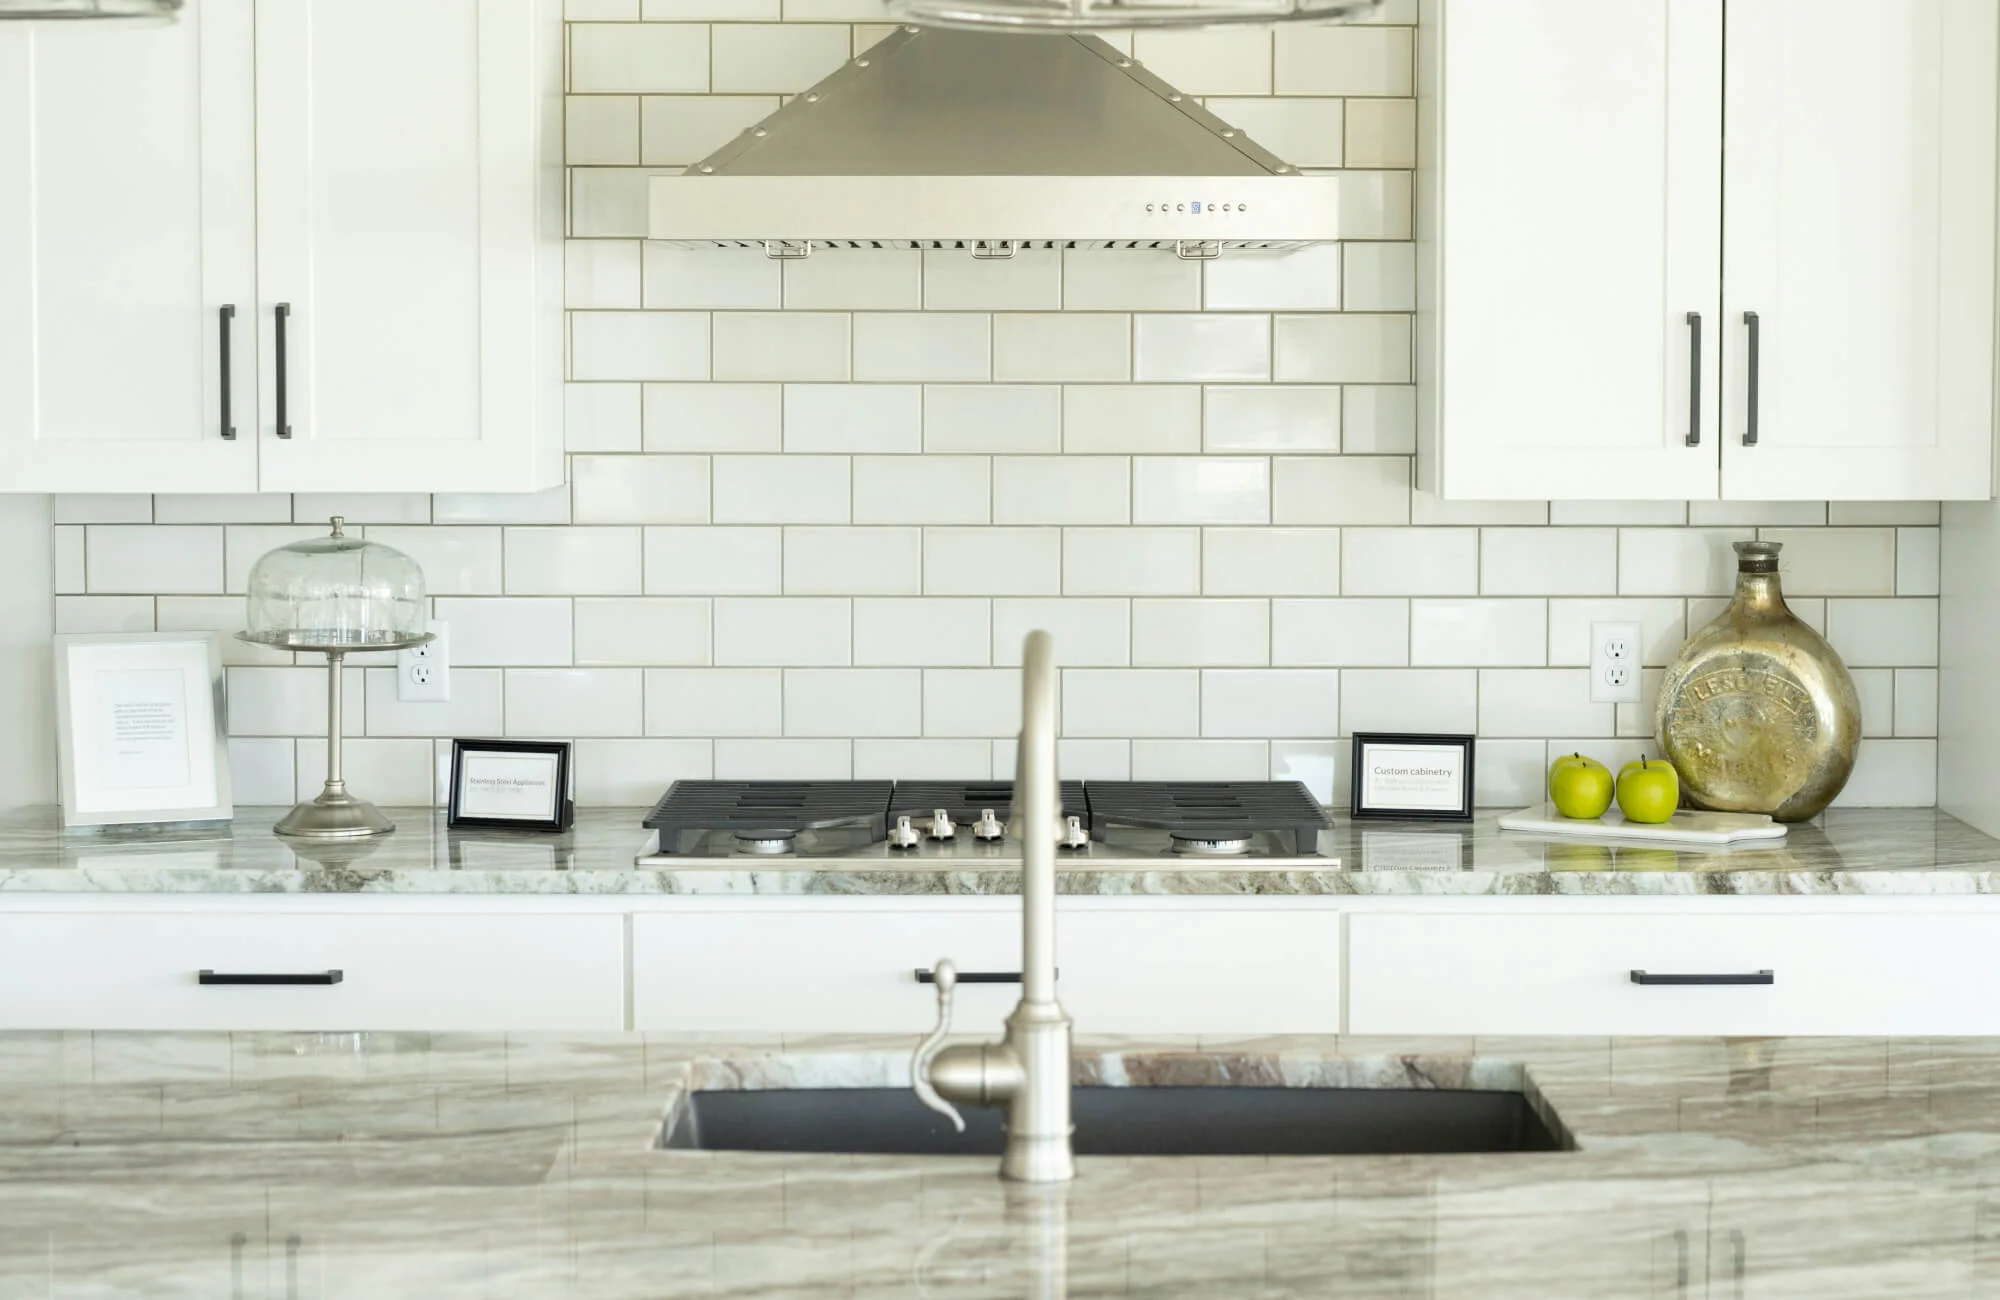
A well-chosen kitchen backsplash can transform the space, protect walls from splashes, and reflect your personal style. Among the most enduring options is the classic kitchen subway tile backsplash, which blends timeless design with practical performance. Whether you’re renovating a small galley or a chef’s kitchen, subway tiles offer a flexible canvas that works with countless cabinetry finishes and countertop textures.
Why subway tiles stand the test of time
Subway tile emerged as a functional solution in urban kitchens and bathrooms, prized for its clean lines and easy maintenance. The glossy or matte surface options catch light, making a room feel brighter and more open. The rectangular shape, typically 3×6 inches, is familiar yet modern, allowing homeowners to create everything from a strict brick pattern to a softer stacked look. The versatility makes it an ideal choice for both traditional and contemporary homes.
Patterns and materials to consider
When selecting a pattern, consider how you’ll use the space. A classic brick-lay layout offers timeless appeal, while a vertical stack or herringbone pattern adds visual interest without overwhelming the room. Materials range from ceramic and porcelain to glass and natural stone. Ceramic and porcelain are durable and easy to wipe down, while glass tiles bring a reflective gleam that enhances smaller kitchens. Stone options, such as marble or travertine, deliver luxury but may require more maintenance and sealing.
Color and grout decisions
Color choices set the overall mood. Crisp white tiles create a bright, airy backdrop and pair with most cabinet colors. Softer beiges or cool grays offer a calm, modern aesthetic, while navy or charcoal tiles can make a bold statement. Grout color is equally important: a white grout creates a seamless, clean look, gray grout can hide minor stains and emphasize the tile shape, and a contrasting grout color can highlight the brick pattern for added texture. If you’re unsure, start with a neutral grout and add color through accessories and appliances.
Practical tips for installation and maintenance
Before you start, measure the wall carefully and plan for outlets, knobs, and vents. If you’re confident in DIY tiling, invest in quality spacers, a leveling system, and a proper tile cutter. For a professional finish, hire an experienced tile installer who can manage edge trim and caulking around the splash zone. Regular maintenance is straightforward: wipe with a mild cleaner, avoid harsh abrasive pads, and reseal natural stone tiles as recommended by the manufacturer. A well-sealed surface will resist stains and moisture for years.
Design tips to maximize impact
Pair the backsplash with complementary countertop materials—quartz or granite in neutral tones often harmonize well with subway tiles. Consider the lighting in your kitchen; under-cabinet LEDs can dramatically enhance the tile’s depth and color. If you choose a busier pattern or bolder color, balance it with simpler cabinetry and hardware to prevent visual overload. A coordinated approach across backsplashes, countertops, and fixtures creates a cohesive, high-end look.
Where to start your project
Begin by collecting samples of tile, grout, and a test swatch of your countertop color. Create a small mock-up on poster board to visualize how the tile will read in your space. Once you settle on a pattern and color, calculate material quantities, order extra tiles for cuts and breakage, and plan a realistic timeline. If you’d like more guidance, visit A Home Guru for design ideas, product recommendations, and step-by-step tutorials that can help you handle a kitchen subway tile backsplash project with confidence.
Ready to explore your options? The right kitchen subway tile backsplash can elevate your cooking area, improve durability, and add lasting value to your home. With careful planning, quality materials, and a thoughtful layout, you’ll enjoy a stylish, functional backsplash for years to come.